Monday 31 August 2015

Red Floral Sleeveless Blouse


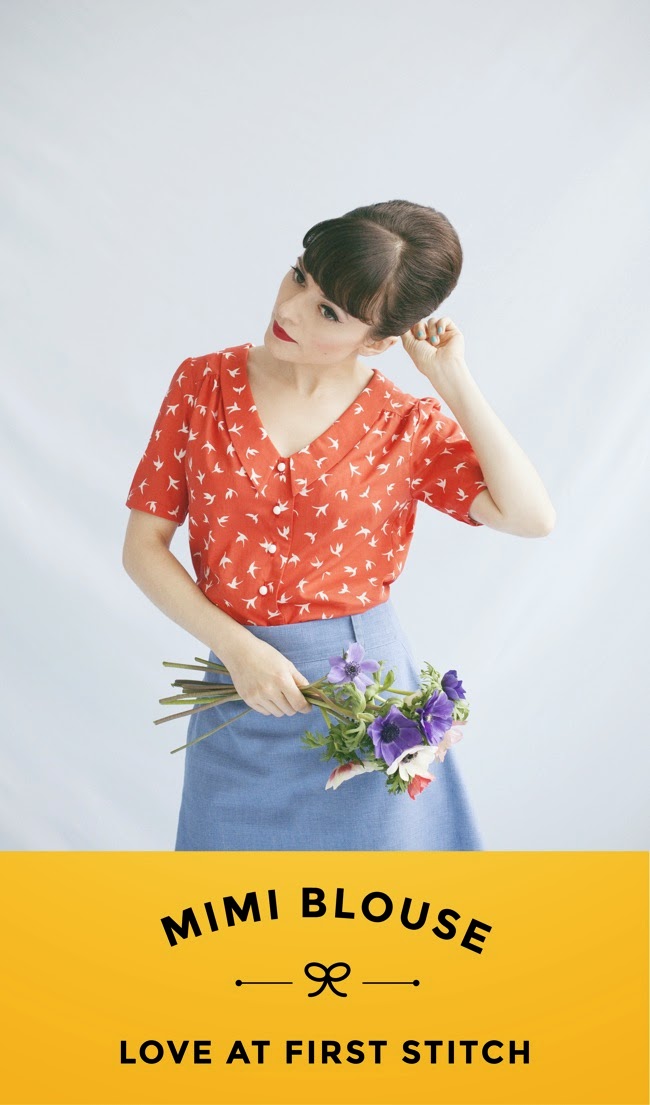
I've developed a bit of 'thing' recently for sleeveless shirts ... well, before we lost the glorious summer weather. I love the fact that they are so cool and comfy whilst looking smart- making them perfect for my work wardrobe.

I always start my makes by picking a pattern and this one was no exception. The pattern comes from Gertie Sews Vintage Casual by Gretchen Hirsch. The original pattern comes from the 40's style blouse pattern (left picture) which doesn't really appeal to me but there is also a variation for a sleeveless blouse (right picture)which I much prefer.


I really enjoy using Gertie's patterns. The instructions are very well written with nice diagrams to give you guidance. What I really like is that all the techniques are in the beginning sections of the book, so there is no need to stop and find a tutorial or another book when you need to know how to construct an armhole facing using bias binding. Something new to me about this blouse was the fact that I first had to make some edits to the pattern, such as adding length and extending darts.


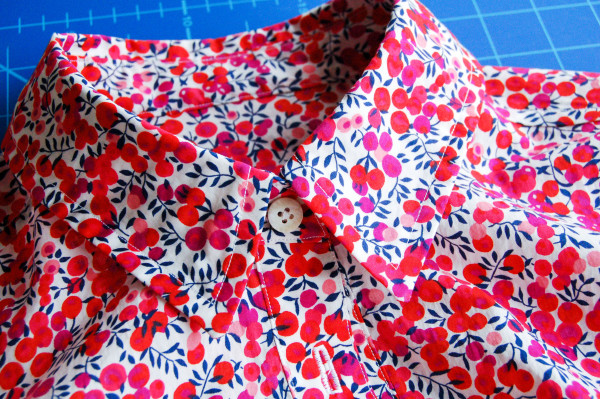
I picked this red floral print fabric with the blouse pattern especially in mind. It comes from my trip to Walthamstow market and it was only £2.20 a metre of which I bought 1.5m. It was lovely to work with, easy to press and cut so no problems there. It has a nice drape to it which has given the blouse a soft look, rather than a starchy collar.


The construction was straight forward, however, I challenged myself to get this done in a day! I made this on a Saturday and needed to have it finished as I was going down to my sisters the next day. I had it in my mind that I wanted to wear it for a day trip to the Isle of Wight we had planned for the Monday.


I cut it out on Saturday morning and had it sewn up, minus the buttons and button holes by dinnertime that evening. I had just enough time to sew the buttonholes and buttons on Sunday morning and then I finished off the hand stitching and neatened it up in the evening at my sisters. Not quite a day, but some speedy sewing at least for me.


I'm reasonably pleased with this blouse. I wasn't sure about the fit at first, as I wanted it to be more fitted. I did wear it to the Isle of Wight and it was comfortable to wear. On reflection, I'm not sure that it would look right if it was ultra fitted.


Despite speedy sewing on my part, it is neatly finished and the construction went well. I managed to muck up one of the darts on the front left of the blouse but it's not noticeable due to the print. No one ever looks that closely anyway!


The buttons seem to be to far over for my liking and to be honest the colour isn't a perfect match. (Note to future self: take a sample of fabric with you to the button shop!) I think I'm my own worst critic when it comes to my sewing, as my Mum and my Sister didn't notice anything wrong with the buttonhole placement.

For the next one (yes, it's already in the pipeline!) I'm going to consider the fit more carefully and see if I can tweak it to make it slightly more form fitting. Maybe by sewing wider seams just along the sides? I don't like the horizontal buttonholes and so will change these to vertical ones.


This blouse is definitely very wearable - I'm looking forward to wearing it to school when we start back up again - and I haven't lost my love of shirts with collars. I see plenty more in my future!

Do you like wearing shirts with collars? 

Wednesday 26 August 2015

Sewing in Pairs

I've been taking stock of my handmade wardrobe and making plans for the Autumn and Winter. My wardrobe contains a lot of items I think of as 'work clothes', which is basically anything I have that is school appropriate.

One thing I have noticed is that there is not much difference between my Spring/Summer and Autumn/Winter wardrobes, except tights. I wear the same colour palette of brights and jewel tones throughout the year but bare legs are covered with tights and bare arms are covered in cardigans.

Whilst doing this I also noticed that I sew a lot in pairs. For example:

Two Moneta Dresses: 

Two Hollyburn skirts:

Two Mimi Blouses:

Two Megan Dresses: 


I've also sewn two Alma Blouses and two round neck Simplicity Polka Dot Tops (You can see My Wardrobe here).  So why have I sewn in pairs?

Well, the answer is because generally I improve on the fit of the first make in the second one or I might make a second version because I love the first one so much. I have yet to make more than two of the same pattern.

Ironically, my sewing plans feature some more 'second time' make's and one 'third time' make. So here are my 'up and coming' sewing projects in no particular order:

  1. McCalls 6696 Shirtdress. I have some navy blue tile print bought from my trip to Walthamstow, which I would like to make into another shirtdress. This time I plan on adding short sleeves and will try pleating the skirt instead of gathering. 
  2. Love at First Stitch Mimi Blouse. This will be my third Mimi blouse which I will be making up with a beautiful navy and white heart print fabric. I have decided that the sleeves do not suit me at all, so will replaces these with the sleeves from the Megan dress. 
  3. Gertie's Vintage Casual Sleeveless Shirt.  I have made one previously (yet unblogged) and want to give this pattern another go as I think it could be a good work staple. I have some turqiouse and cerise flower print viscose to make this with. 
  4. Gertie's Vintage Casual Sweetheart t-shirt. I love this t-shirt so much and want to make another out of some left over black and white striped jersey. I've ordered a new twin needle as I'm not happy with my current one, so will have to wait until this arrives. 
I'm at the end of my summer holidays- school starts back after the bank holiday weekend- so realistically, not much of these are going to get started for a while. I've spent a lot of this week already working on school bits. I predict that I will have less projects to blog about and less time to blog once school starts, but I enjoy blogging so will continue when I can.  


What is your next sewing project?

Wednesday 19 August 2015

Knitting Owl


Following my post on my sewing squirrel, I couldn't resist sharing this little one with you too! I started knitting this back in Easter and the finished pieces have been lurking around in my knitting back waiting for me to finish it. I finally got around to hand stitching all the parts together last week.  


The pattern comes from issue 69 of Knitting and Crochet magazine, which included free yarn to create a range of projects. I chose this Owl as a small project I could complete whilst on holiday.


The one on the left was made by my Mother-in-Law who also liked the pattern.

Enjoy the rest of the week!

Monday 17 August 2015

Sweetheart T-Shirt


Something I've not sewn to date are jersey t-shirts. I've always figured that t-shirts are so cheap to buy what would be the point in making your own? Until now.

I had some scrap jersey fabric left over from making my Moneta jersey dresses and a spare afternoon and wanted a quick project, so decided to have a go at sewing a t-shirt.


The pattern is the Sweetheart T-shirt from the book Gertie Sews Vintage Casual by Gretchen Hirsch. I've had this book since Christmas but have yet to get around to sewing anything from it. I did get my Husband to photocopy the pattern sheets at his office, to save me tracing the patterns!!


The fabric I have used for this T-shirt is left over from my royal blue Moneta dress. I had very little fabric left, probably about one square meter. I managed to squeeze this t-shirt out of this by cutting the back as two pieces. I added a 5/8" seam allowance along the fold line and just sewed it up to create the back piece!


The t-shirt came together well. I used a narrow zig-zag on my machine for seams and also topstitching the neck and arm bands. This was the first time I have made a neckline like this but is very simple to do and I love the neat effect.  


I think the fit of the t-shirt is good; the fabric is very clingy so it is very fitted. I wore it for a full day after taking these photos and it was very comfortable. I can't decided whether the clingyness is due to the fabric or if I need to size up. 


The neckline is a sweetheart that starts a simple scoop neckline. To create the sweetheart you sew a small dart into the centre of neckline and then pleat and topstitch some gathers at the front of the t-shirt. I think the neckline looks flattering and I also like the cap sleeves on this t-shirt. 


I think this looks nice paired with both jeans and also tucked into a skirt. It kind of reminds me of a gymnastics leotard I used to have as a little girl, which was a similar colour.

I've really been inspired to make t-shirts. There quick, easy and only use a small amount of fabric so are not too expensive. I'm definitely going to me making some more.


There are loads of t-shirt patterns available out there. Here are some of my favourites: The Weekender Sunshine Top by Hot Patterns, The Bronte Top by Jennifer Lauren Vintages and Agnes by Tilly and the Buttons

What's your perfect t-shirt?

Saturday 15 August 2015

Sewing Squirrel


Happy Saturday! I finished this little guy this week and just wanted to show him off. The pattern is from a book my Mother-in-Law surprised me with last week called Sew Sunny Homestyle by Finnanger Tone. When I saw this cutie I knew I had to make one!


A very short project, this took me about 2 hours to trace the pattern, cut out and sew the pieces and then a little longer to stuff and hand stitch it all together. I enjoyed using my sewing machine to sew on the tummy patch using a faux blanket stitch. 


The face hand embroidered and pink cheeks created using blusher! Cute, no?

Have a great Saturday everyone!

Friday 14 August 2015

Burda 6874: Men's Stripy Shirt


I've actually done some unselfish sewing this past weekend and made my Husband a shirt. This is the second shirt I have made him - the previous shirt hasn't had much wear as it is not as fitted as my Husband would like. We've just had our first wedding anniversary last weekend, so this a (belated) anniversary present for him.


The pattern is Burda 6874. I'm going to go ahead and say that I didn't choose this pattern - my Husband came home from work one day proud as punch with this pattern in hand, which he had chosen and ordered by himself from the John Lewis website. It's really nice to have a partner who is involved and actively encourages my hobbies. However, this is probably the worst pattern I have ever worked from.

The instructions are minimal and sometimes confusing. I agonised over which size to cut out. My poor Husband was subjected to repeat measurements and comparisons of the finished garment sizes. I consulted the size chart on the Burda website but this didn't really help. In the end I went for a size 38, which based on the finished chest sizes would be too big but the yoke should just about fit across his shoulders.


The fabric is a polycotton striped shirting, with a white background and navy blue stripes which I picked up for £1 per metre on a recent trip to Walthamstow. The idea was to use some cheap fabric to create a hopefully wearable muslin to test the fit. It was nice to work with and has a very slight stretch.

I did make some changes to the pattern and the construction:
  • I cut Version C, but only used one pocket. I made the pocket square because ironing the seam allowance on a curved pocket was tricky (Shh ... don't tell the Husband, he'll never know!) I also didn't sew a buttonhole onto the top of the pocket #lazyseamstress 
  • My Husband wanted a short sleeved shirt so I measured the length of the one his existing short sleeved shirts, added seam allowances and then just folded the pattern piece accordingly.
  • I cut the yoke perpendicular to the grain instead of on the bias, so that the stripes are horizontal.
  • In order to avoid hand stitching the yoke facing I used the burrito method which is much easier. There is a great burrito yoke facing tutorial by Grainline.
  • I totally ignored the construction directions for the collar, instead using instructions on sewing a collar by four square walls. 
Once I had made the yoke I tried the shirt on him, pinning the front plackets together to get a sense of how it would fit. Surprisingly it fitted well, but to give my husband a bit more wiggle room, I sewed the seam allowances at the shoulders, sleeves and sides at 3/8".


As this was only a wearable muslin, I was very lazy with matching up any of the stripes. I did make sure the pattern pieces were running along the grain so there were no wonky stripes. The shirt was actually really quick to make - I cut it out and started it on Saturday morning and then finished it on Monday afternoon. Thankfully, the fit is really good and he is pleased with it.


I also managed to mislay the diamond shaped pattern piece needed to make the tiny triangles at the bottom of the side seams. I just measured the correct width and height to cut them out. I'm pleased with how they have turned out. Surprisingly I had some issues with the curved hem on the shirt, but found an ace tutorial on how to hem a curved edge by machine by Colette, which solved the problem.


I'm still having issues with the collar. I've managed to get it looking neat but I've centred it around the edge of the right front, when in fact should be centred around the inside edge of the placket so it does not sit evenly. It's not that noticeable but now I'm aware of it I will be able to make sure it looks better next time.


My Husband has also requested that the sleeves be slightly longer, so I need to add around 1" so they are a better length. 

I've decided it's not bad for a first attempt! I think it will be a wearable muslin and it has certainly given me the confidence to attempt another to fix some of the issue with this one. 

Have you ever made a shirt? 

Tuesday 11 August 2015

Mystery Fabric


I wanted so share this fabric that I have had in my stash for a while now, which is somewhat a mystery to me. It originally came from my Mum's stash; it was part of a bundle of fabric that my Mum saved from being thrown out at her school. It is a really beautiful turquoise leaf print on white background. The mysterious part is that I have no idea what kind of fabric it is. Cotton? Polycotton? It's very sheer and I would describe it almost as a voile. I also have another larger piece of similar turquoise voile, which I found in the remnants bin at a local fabric shop. I bought 1.7m for £4.


The problem I have is that the leaf print voile is only 25 inches wide, although it is 79 inches (2m) in length. I've been trying to think of something for which I can use this fabric. I don't really want to make it into a skirt as it is such a small print that I think would get lost, so would prefer a top or blouse. I'm also concerned about how sheer the fabric is. 

Left: Collette Sorbetto Vest, Top Right: Fifi Cami Bottom Right: Diana Cami by Spit Up and Stilettos. 
So far I've come up with either another Collette Sorbetto Vest or maybe a Diana Cami by Spit Up and Stilettos. Another idea is the Fifi Cami by Tilly and the Buttons, although I'm not sure if I would have enough fabric for this. 

So here's my plea for help: Anyone got any ideas for a garment that I can make which uses such a small amount of fabric?

Saturday 8 August 2015

Black Mimi Blouse


Hi All. I'm working steadily through my 'to sew' list and have finished another make. It's the Mimi Blouse which features in Love at First Stitch by Tilly Walnes. This is actually my second Mimi blouse, I made a white version out of some drapey viscose last summer which I have worn quite a lot. It's very much a wardrobe staple and so I quickly realised that one in black would also be a good addition to my wardrobe.


The fabric is a black polycotton which I ordered online. I can't remember how long ago I cut out this fabric but it was definitely before christmas. After blogging about it here recently, I figured it was time to get it finished!! I originally cut out a contrasting cream collar and planned to add cream piping to the gathers but decided against this.


I cut out a straight size size 3, which is the same as my previous version. I think I cut out a larger sleeve size, as the cuffs on my white blouse are slightly tight around my upper arms. This does not seem to have made any difference though, so in future versions I may need to make some further adjustments to the sleeves.


The construction was straightforward- I have definitely improved my sewing skills and this blouse came together much easier than my previous version. I really like the collar, which sits very nicely and I feel confident with this type of construction. Go me!


The only adjustment I made to the pattern is the buttons. Instead of the recommended 12mm buttons mine were much smaller at only 5mm. I therefore had to change the spacing, which required me to research how to do this. I put together a blog post on button etiquette to document all my research. The blouse front measured 17" without seam allowances, which when divide by 8 (for 8 buttons) gave me a distance of 2 1/8" between each button. In hindsight, the buttonholes are too far in from the edge of the blouse and would have looked better if they had been closer to the edge.


I think the blouse has turned out well. It has a very structured look to it, due to the fabric and although I've gotten away with it, I'm not sure that it is the best choice for this pattern. Whilst it's not a very summery make I think this blouse will get worn loads in autumn and winter. I plan on wearing it tucked into corduroy or wool skirts with black tights.

Anyone else starting to plan or make for the Autumn?

Friday 7 August 2015

Bloglovin ...

Hope you are all enjoying the lovely weather we are having this weekend.

Just a quick post (if anyone is reading) to let you know I'm now on Bloglovin, so if you would like to follow my blog on Bloglovin please follow the link below.

Follow my blog with Bloglovin

Thanks!

Button Etiquette


Hi everyone, it's almost the end of week three of my six week summer holiday. At this point I'm starting to get a bit stir crazy, as I have been spending a lot of time at home since I'm short on cash. I've been doing quite a bit of sorting out, having filed my paperwork and streamlined my wardrobe, as well as spending time sewing.

I'm making good progress through my 'to sew' list and have noticed that all my planned projects have one thing in common ... buttons!

Button placement photo via Sewaholic

I have a long list of blouses, shirts and shirt dresses which all require me to sew buttonholes. Despite the fact that I have successfully sewn buttoned garments, I always feel a little bit of dread at the thought of sewing button holes. In order to improve my buttonhole technique I've been doing some online research to fill some gaps in my button related knowledge.

How far apart should I space my button holes? 


Buttonhole placement has been the main thing that has been confusing me lately. All the patterns I am using come with recommended buttonhole placements for a certain size button, but if you want to go off piste and go with a smaller button size, for example, I have no idea about placement. How far apart should they be?

Diagram from Buttonhole placement tutorial by A Fashionable Stitch. 

After a bit of research I found a Tutorial on button placement by Sewaholic. The idea is that you pin where your bust is fullest (after trying the shirt on) as this is where the most gaping would be. You can then use a handy tool called a Simflex to work out the position of the remaining buttons, depending on how many buttons you would like.

However, if you don't have a spare £10 to spend on a Simflex, then this can be calculated and there is a fantastic Tutorial on buttonhole placement by A Fashionable Stitch. You can calculate the buttonhole placement by working out the length of the shirt front minus the seam allowences and divide by how many buttons you want. This will tell you how far apart your buttons should be. Exactly what I was looking for- problem solved!

Photo via Sew Mama Sew

How long should button holes be? 


To work out the length of buttonhole you need to measure the diameter of your button and then add 1/8" or 3mm (see Love at First Stitch by Tilly Walnes). If your using a tall button (e.g. with a shank) then you need to also add the height to this measurement to get the final length of your buttonhole.

How do I accurately place my buttons?


Tilly Walnes, from Tilly and the Buttons suggests pinning the buttonhole placket over the button placket and then using your buttonholes to mark button hole placement. I have found in the past that this is a bit hit and miss. I find it more accurate to use the markings on the pattern to guide my button sewing. I've recently discovered how to sew buttons using my machine with a button foot attachment, which has made sewing buttons so much more accurate and far less time consuming!

How to sew a buttonhole picture via Dana Made it. 

What types of button holes are suitable for different garments? 

According to Craftsy, traditionally on blouses or shirts buttonholes are placed vertically, running parallel to the edge of the placket, whereas on a jacket or coat the buttonholes are placed horizontally to ensure there is no distortion with movement.


My sewing machine (Singer Confidence 7470) does different types of buttonholes and I'm never sure which one I should be using. After some research I found that rounded ended buttonholes (the last two in above picture) are best for lightweight garments such as blouses and square buttonholes (first two buttonholes) work best for medium to heavier weight fabrics. Keyhole buttonholes (3rd and 4th buttonholes) are rounded on one end to accommodate thicker buttons or buttons with a shank; these are used mainly on coats and jackets with heavier fabrics.

Why do mens and women's shirts button up on different sides?


I've sewn shirts for my Husband before and I have to actually think about which side the button holes should go. Usually I just check one of his or my existing shirts to work it out but I wanted to find out why there is this difference. According to Primer magazine, Mens buttons are on the right because they dress themselves where as historically women Women's buttons were on the left because they would have had a maid to dress them and this meant that the buttons would be easier for a right-handed maid to fasten. I'm not sure how true this is but it might be one reason for the difference!

I've learnt a lot about buttonholes in my research and now have a much better understanding of placement and different types of buttonholes. None of this information is new (no point reinventing the wheel) and I've included links to tutorials that I have found informative. I hope that by gathering this information together it may be useful to someone ... I think of it as a lit review!!

So, I'm off to put some of this new found knowledge into practise!

Do you love or loath sewing buttonholes?